rootlessJB now allows you to install jailbreak tweaks on iOS 12.1.2 and below versions. Here’s a simple tutorial detailing how to install Cydia tweaks using PatcherPlus.
Table of Contents
How tweak installation works on rootlessJB
Just like the Electra Jailbreak Toolkit that was released last year for iOS 11.0-11.1.2, you must patch and transfer tweaks on iOS 12 manually.
This time around, though, rootlessJB iOS 12 jailbreak has replaced Electra. However, the features and capabilities of both the tools largely remain the same.
To install a tweak, you must first patch its Debian package using patcherplus, then transfer it to your Apple device using iFunBox.
Both of these tools require a computer running macOS, so if you don’t have a computer or a laptop right now or only have a Windows computer, it’s a no-go for you.
Tweak injection is now working on rootlessJB 3.0 on iOS 12.0-12.1.2 (dev – @Jakeashacks). #RETWEET if you are on iOS 12 pic.twitter.com/Logen7QI2S
— Yalu Jailbreak (@Yalujb) February 3, 2019
This installation method is a bit “raw” and it took me two hours to get the process down to a tee. But once you get the hang of it, you can install tweaks within minutes.
If you own a Mac and know how to fiddle around with the Terminal, follow the tutorial given below. But before you go ahead, read the disclaimer given below.
- Disclaimer – This tutorial is NOT aimed at novice users and could potentially brick your device forcing you to update it. DO NOT try it unless you are a developer or power user.
Requirements
- A compatible iPhone or iPad
- A computer running macOS Mojave or below (optional)
- iOS 12.0-12.1.2 firmware
- Filza file manager (GeoFilza or FilzaEscaped12) (optional)
- iFunBox (optional)
How to install Cydia tweaks on iOS 12.0-12.1.2 with patcherplus
Install Homebrew and dpkg dependency
Step 1 Open a Finder window on your Mac. Go to Applications > Utilities and launch a Terminal window.
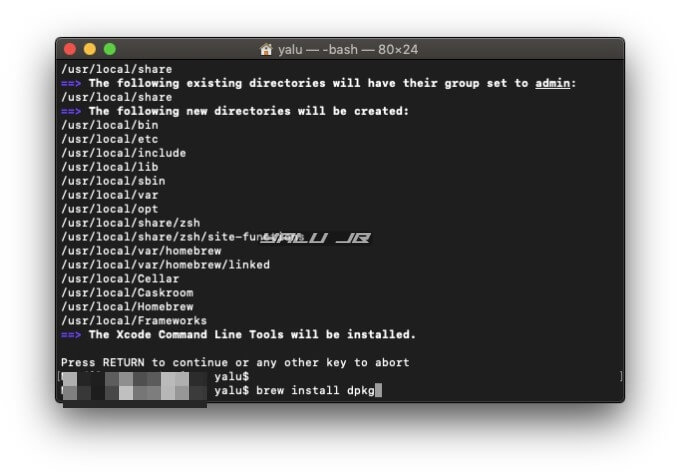
Step 2 You will now want to install Homebrew package management system on your Mac. Enter the following command to install Homebrew –
ruby -e “$(curl -fsSL https://raw.githubusercontent.com/Homebrew/install/master/install)”
Step 3 Press the ENTER or RETURN key to start the installation. Pressing any other key will abort the operation. The installation should take about a minute or two to complete.
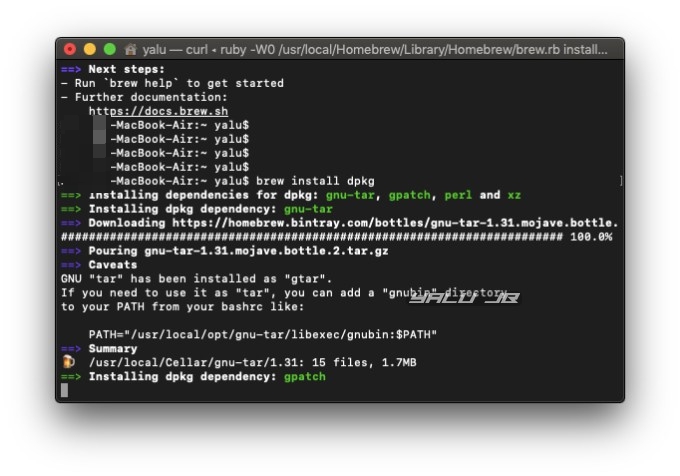
 Step 4 Install dpkg by entering the following command –
brew install dpkg
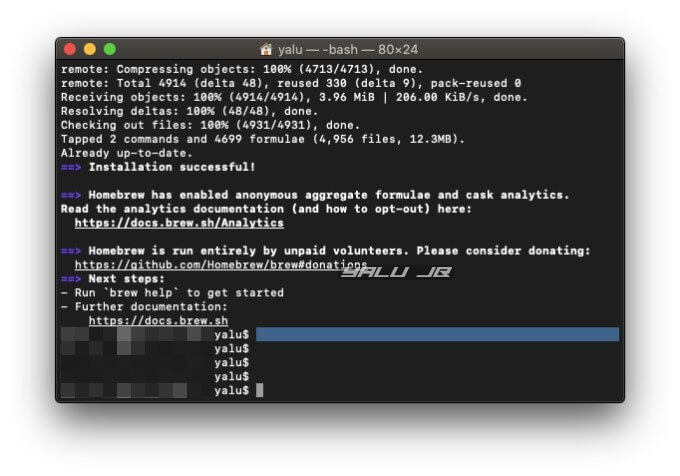
 Once Homebrew and dpkg are installed, you can move onto the next step and start patching the desired Debian packages.
Patch Debian packages with Patcher Plus
Step 5 Install the latest build of patcherplus for macOS from this link. Unfortunately, patcherplus doesn’t support Windows as it relies on Homebrew and dpkg dependency, which are not available for Windows.
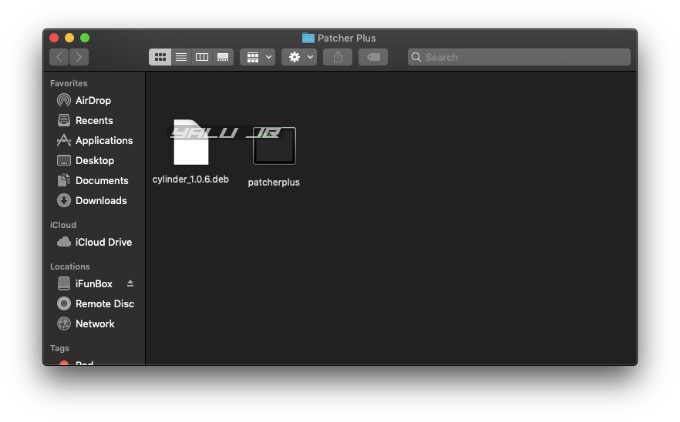
Extract the contents of the package, create a new folder on the desktop, and move the patcherplus to the newly created folder on the desktop.
Step 6 Download the Debian file of tweak you want to install on your device. For the sake of this tutorial, I will use Cylinder Cydia tweak that you can download from this link.
Step 7 Go back to the Terminal window, type chmod +x and drag the patcherplus file into this window.
Step 8 Run ./patcherplus command to start the jailbreak tweak patcher. It will display three options –
- patch .deb
- sign .dylib(s) – Must run patcher first!
- exit
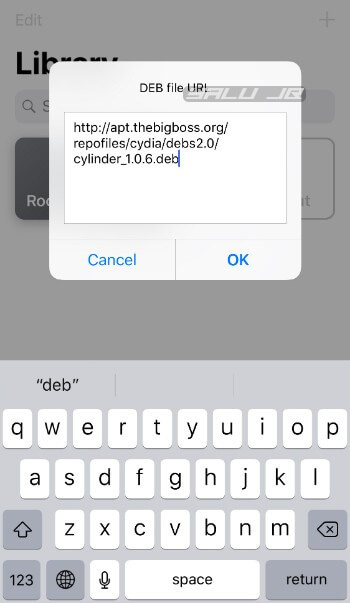
Step 9 Press 1 on your keyboard. Drag the Cylinder_1.0.6.deb to the “enter deb to patch:” field.
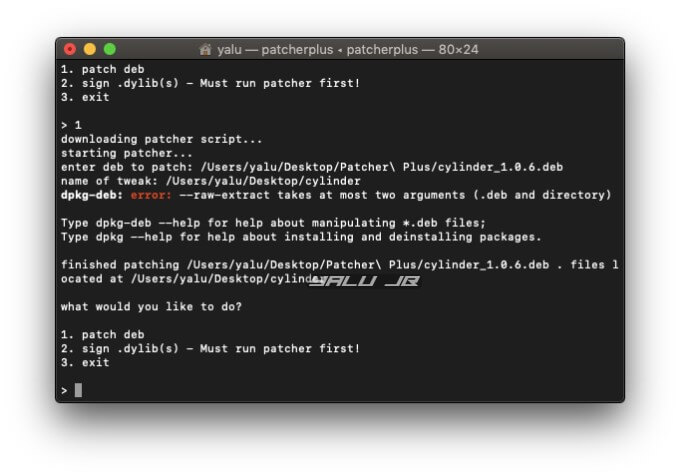 Step 10 Patcher will now prompt you to enter the name of the tweak. If you enter the tweak name here, patcher will fail and it will just create an empty folder. So, you must type the location name manually as shown below –
/Users/<your username>/Desktop/
Since my username is “yalu”, the full command will be – /Users/yalu/Desktop/
Step 11 Wait for the patcher to patch the Debian package. Once the patching finishes, it will expert a new folder called “Library” containing the tweak files to the desktop.

You have successfully patched the Cylinder tweak using patcherplus. The next step involves transferring the files from your computer to your iPhone or iPad using iFunBox.
Transfer folders to your device with iFunBox
Step 12 Launch iFunBox utility. If you don’t have it installed on your Mac or MacBook, you can get it from here.
Step 13 Connect your iPhone or iPad to your computer and ensure that it’s in jailbreak mode.
Step 14 Go to the General Storage section in the sidebar to access your device’s filesystem. If the screen is empty, click the Media option present in the bottom bar.

Step 15 Right-click and create a new folder. You can name it anything you want, for example, “RootlessTweaks” or something else. Just make sure it’s unique and you are good to go.
Also, you must make separate a subfolder for different tweaks inside this folder because tweaks often have similar folder names. This will help prevent conflict. 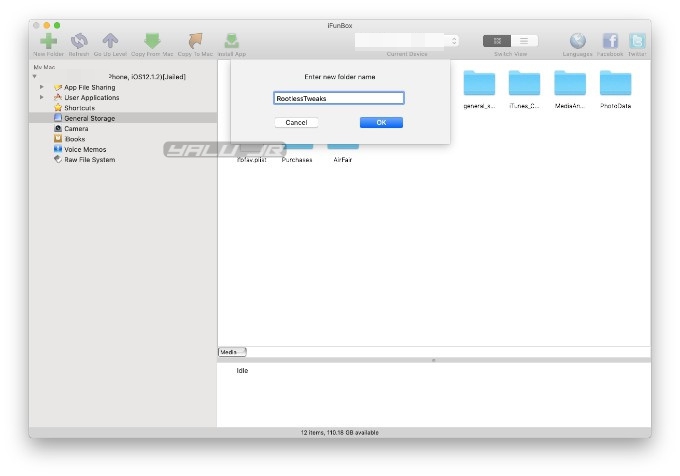
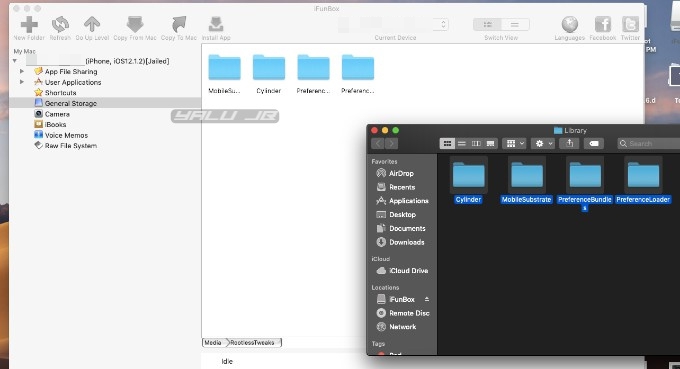
Step 16 Now open the Library folder again and drag and drop all the files present therein to the “RootlessTweaks” folder in iFunBox.
Move tweak files with Filza file manager
Step 17 Open Filza file manager.
Currently, there are two file managers available for iOS 12 – GeoFilza and FilzaEscaped12. You can use either of them as both of them are based on the original Filza file manager.
For the sake of this tutorial, I will use GeoFilza as it’s already installed on my iPhone.
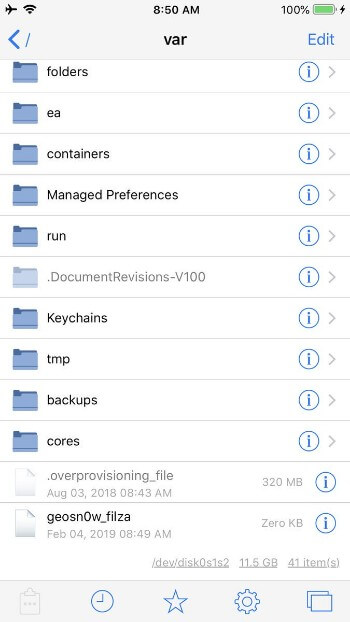
Step 18 Go to this location – /var/mobile/Media/<iFunBox folder name>/
Step 19 Copy all the files present in the folders here (Cylinder, MobileSubstrate, PreferenceBundle, and PreferenceLoader) one by one and move them to corresponding directories in the Library folder in /var/containers/Bundle/tweaksupport/.
Step 20 After you have moved all the files to their appropriate locations in the Library folder, find the Cylinder.dylib present in the MobileSubstrate folder. If you are installing some other tweak, you must use its associated dylib file.
Step 21 Press the “i” button present next to it and scroll down until you find the Ownership section.
Step 22 Make sure the Owner and Group values are set as “mobile”. If they aren’t, scroll down and manually set both these values as “mobile”.
Step 23 Now go to the Access Permissions section and select Sticky.
Step 24 Change this value from 0644 (default value) to 0777 (modified value).
Reboot your iPhone/iPad
Step 25 Restart your Apple device to un-jailbreak it.
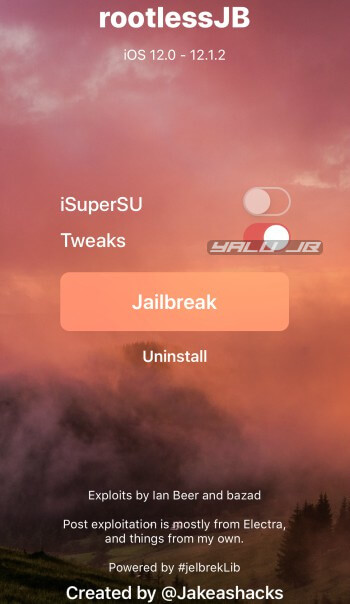
Step 26 Re-jailbreak using rootlessJB to have functional tweaks.
If you get stuck somewhere, check out this amazing video tutorial by Ben Mitchell. It’s a bit rushed at some points but will still let you get your favorite tweaks running.
If you are unable to get it working, please save yourself the hassle and wait for an automatic package manager system for iOS 12.
Alternative Method using Rootless Tweak Patcher/Installer shortcut (No Computer required)
Install the shortcut
Step 1 Install Apple’s very own Shortcuts app from the App Store if you don’t have it installed on your device already. You can use the official download link given below.


Step 2 Click and open the RoutineHub shortcut from this link.
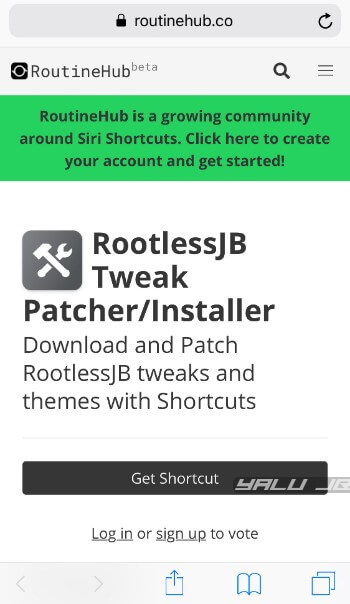
Step 3 Tap Get Shortcut to add this shortcut to the Shortcuts app.
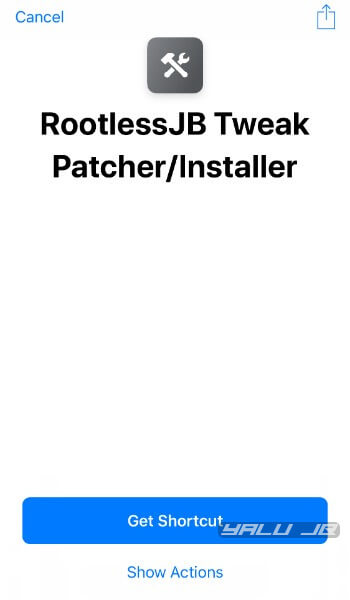

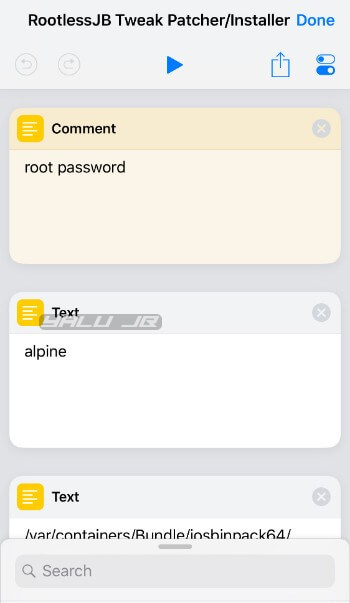
Step 4 Tap the “more options” button to access the shortcut’s actions. Change the “Text” field to alpine, which is the default SSH password for iOS.
Copy the Debian package
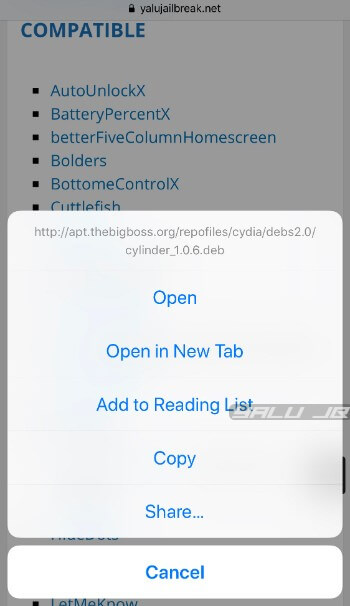
Step 5 You will now want to download the desired tweak that you want to install on your device. Here’s the complete list of all tweaks that are compatible with rootlessJB along with their download links.
Step 6 Click on a tweak and copy the download link for its Debian package. Keep in mind that most of the packages listed here are unpatched.
Unsnadbox the Shortcuts app
Step 7 Open the Shortcuts app again and then press the home button.
Step 8 Launch the iSuperSU utility that comes bundled with rootlessJB jailbreak.
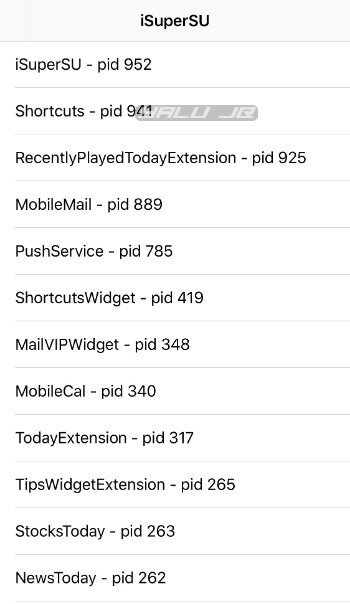
Step 9 Select the Shortcuts app and tap Unsandbox to unsandbox it. Close iSuperSU.

Patch and install the tweak
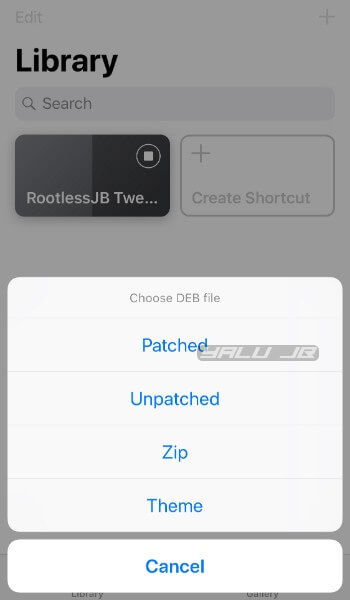
Step 10 Reopen the Shortcuts app and tap the shortcut you added in step 2.
Step 11 Select Unpatched. If you are installing a pre-patched tweak or a ZIP package or a theme, be sure to select the appropriate option.
Step 12 Paste the download link you copied in step 6 and select OK.
Step 13 Tap Respring to restart the SpringBoard to ensure the tweak gets loaded properly.
![Springtomize 4 – Customize iOS 10 Like Never Before [DOWNLOAD]](https://cdn.yalujailbreak.net/wp-content/uploads/2017/04/image-2017-04-04-2-211x150.jpg "Springtomize 4 – Customize iOS 10 Like Never Before [DOWNLOAD]")


Hey what tweaks are compatible with 7+ On 12.1.1
ALl tweaks listed in the “Compatible” section above are compatible.
can you do this in linux mint
No, only Windows and macOS are supported right now.
Wrong tutorial, stop messing up with peoples devices!
Why tweak don’t show in setting ang how can I fix it? Thanks
Preferences are not working with some tweaks even though PreferenceLoader is working just fine.
Cant find tweaksupport folder.
Send a screenshot please.
Is VMware Workstation OK?
Yes, you just need to have macOS, the hardware doesn’t matter.
Hello I am getting the error : There was an error Loading the preference bundle
Thanks in advance
That’s a known issue with some tweaks, wait for an update.
windows tutorial/alternatives? please
There’s no Windows tutorial for this, unfortunately.
of course you still can not do it for iPhone XS and XS Max true?
Yes, that’s right. A12 devices are incompatible at the moment.
Will it work on an iPhone XR?
No, A12 models are not compatible yet.