AutoFill is a new feature in iOS 12 that allows you to enter all your passwords automatically. It works with all kinds of password apps, so you never have to mess around with passwords again. Here’s how you can set it up and get started in an instant.
Password apps on your iPhone help you organize your passwords and can also provide suggestions for extra strong passwords. However, their main disadvantage is that entering passwords is sometimes a bit cumbersome, especially in third-party apps.
Copying and pasting usernames and passwords makes the process more difficult than necessary. Fortnunately, the AutoFill feature in iOS 12 resolves this issue once and for all.
Table of Contents
What’s AutoFill?
As the name suggests, AutoFill is a new password management feature in iOS 12 that ensures all your passwords and usernames are entered automatically.
AutoFill works in both Safari as well as system and user apps, with the keyboard of your iPhone or iPad.
As soon as you have to enter a password somewhere, a suggestion appears from your stored passwords above the keyboard, but you can also browse through your storage to choose a different password.
With a single tap (and a Touch ID or Face ID scan), you can enter a password. Applications, where you have to enter passwords, don’t have to be modified – the AutoFill function recognizes the app and automatically suggests the correct username and password.
It works with your passwords stored in your iCloud Keychain. In addition, password apps such as 1Password and Dashlane can also make use of it.
These apps must be updated for that, but fortunately, many apps are already compatible with this feature.
Which password apps support AutoFill on iOS 12?
The most popular password apps have been updated and fully support AutoFill on iOS 12. You can check out the full list of compatible apps below.
- 1Password
- Dashlane
- Keeper
- LastPass
- oneSafe
How to enable and use AutoFill in iOS 12 on iPhone and iPad
Setup
You only have to set it up once via the settings of your iPhone and iPad. Once you do that, you can start using it right away.
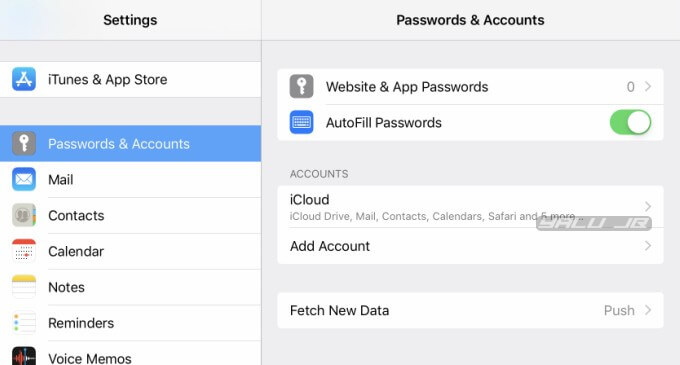
Step 1 Open the Settings app and open Passwords and Accounts.
Step 2 Go to the iCloud section and enable Keychain if you haven’t already.
Step 3 Go back and toggle on AutoFill Passwords.
Step 4 Select the apps you want to use for this function. If you have 1Password, LastPass or any other password app that supports this feature, tap it to integrate it with AutoFill.
Saving Passwords
Before you start using your saved passwords, you need to ensure they are actually stored in your iCloud Keychain.
Step 5 Open the website or app you want to save passwords for. Generally, you should use this feature for websites or apps that you use frequently, for example, Gmail, Netflix, Snapchat and others.
Step 6 Input your username and password like you normally do. Your device will now display the following message –
Would you like to save this password in your iCloud Keychain to use with apps and websites on all your devices?

Step 7 Tap Save Password to instantly save your credentials. You can also select Never for This Website if you don’t want your device to store your password or Not Now to save it at a later point.
Using Saved Passwords
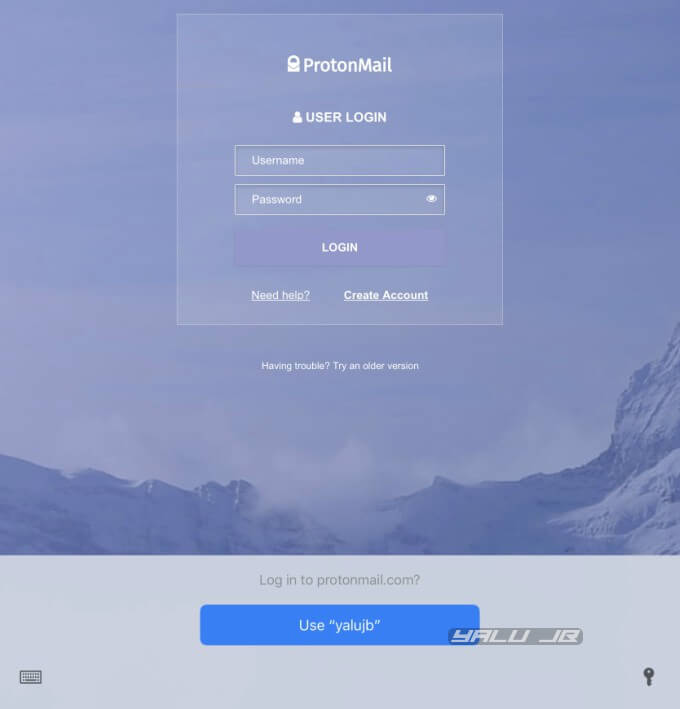
Step 8 Open the app or website you want to log in to.
Step 9 Tap the input field to enter your username and password.
Step 10 A suggestion of saved passwords will automatically appear in the footer. Tap the blue button with your username to automatically input your username and password.
If you have multiple accounts associated with a website or app, then the displayed username will be your primary account.
Step 11 Tap Login to log in to your account.
Selecting Secondary Accounts (optional)
We all use multiple accounts for apps like Gmail and Facebook. Apple is well aware of that and easily lets you select secondary accounts for a single website or app.
Step 12 If you want to use a different password, tap the Passwords button in your keyboard and select your secondary username.
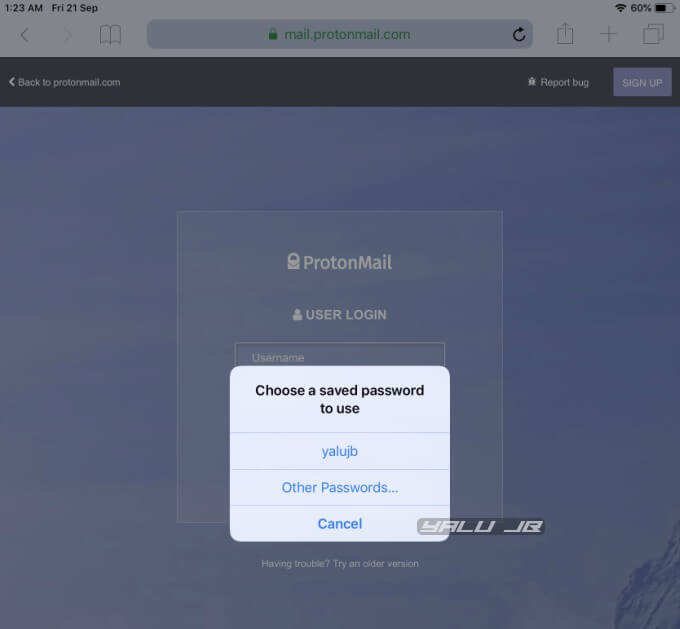
Step 13 Tap Other Passwords… to access the entire list of accounts for the current website or app.
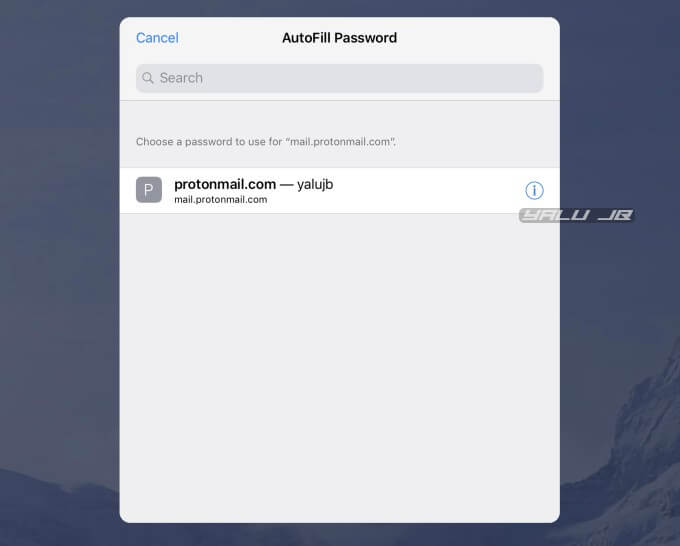
Step 14 Select the appropriate username from the list to log in to your secondary account.
AutoFill also works on Apple TV models running tvOS 12 and above firmware. If you use the automatic keyboard on iOS, the same buttons will appear for entering your password and username as soon as you have to enter your data somewhere on your Apple TV.
The rest of the functionality remains the same.
How to input One-time passwords (OTP)
Some apps use one-time passwords that are automatically generated by a password app, for example. 1Password can automatically copy it as soon as you enter a password and username automatically from 1Password.
In the next screen where you have to enter the one-time password, you only need to paste it from your clipboard. A 1Password notification then restores the previously saved data from your clipboard.
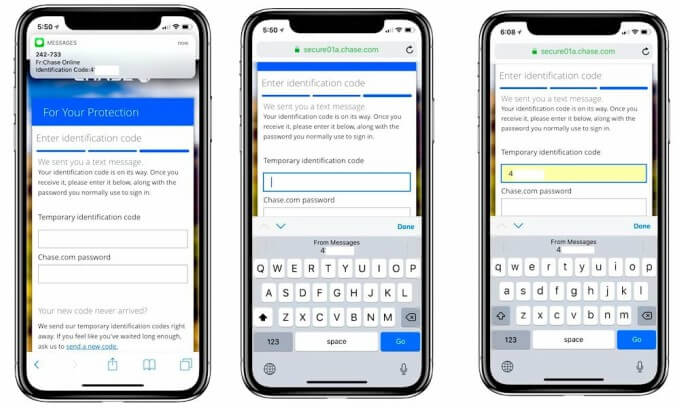
Verification codes sent via SMS are also automatically entered. You no longer have to go to the text message to remember the numerical code and to copy and paste it in the appropriate field.
How to delete your saved passwords
iOS 12 displays your saved passwords in plain text, which is perfectly fine if you are the sole user of your Apple device. However, if multiple users use a single device, it’s better not to use AutoFill. We recommend deleting all saved passwords and codes as this is a major security concern.
Step 1 Open the website or app you want to remove your saved password from.
Step 2 Input the password as outlined above.
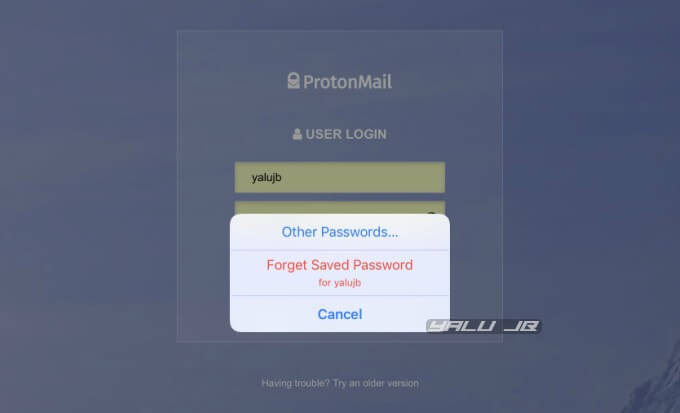
Step 3 Tap the Passwords button in your keyboard.
Step 4 Tap Forget Saved Password to remove your saved password for that website or app.
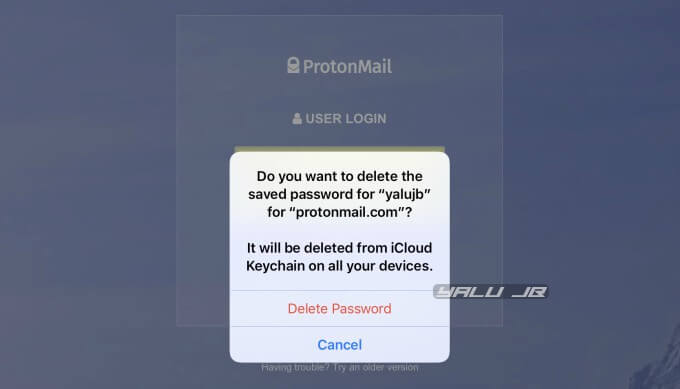
Step 5 Your device will now throw a confirmation popup to continue or not. Tap Delete Password to finish the deletion.
Alternatively, you can delete all your saved passwords in one go from the Passwords & Accounts section in the Settings app.


 in unc0ver jailbreak on iOS 12")
So anybody can turn on autofill and will see my passwords on the keyboard?
No, they will still need to authorize it first using Touch ID.