Along with AirPlay 2, iOS 11.4 brings another notable improvement to the Messages app. You can now synchronize your messages with iCloud.
Table of Contents
How “Messages in iCloud” works
Messages in iCloud allows you to synchronize all messages sent through the instant messenger with iCloud. This feature was announced by Apple in WWDC 2017 and released after a year with iOS 11.4.
You can use this feature to engage in conversation with your contacts on your iPhone, iPad, and Mac.

As far as security goes, all messages stored in the Cloud use end-to-end encryption (E2EE). This encryption method is widely used by messaging applications, for example, WhatsApp.
Why is it necessary?
Previously, messages were only synced if your device had an active internet connection. All incoming messages were still saved in the cloud until you get back online.
However, as soon as you receive the message, it will vanish and offline devices will never receive it.
Now if you try to strike up a conversation with someone, you will only be able to read only some of the messages. The only way to bypass this limitation is to read the messages on all your Apple devices.
This new feature solves this problem and all messages will be synced fully with all your devices.
Since the messages are now in sync, any message deleted from any Apple device will also get deleted from other devices.
Here’s how you can enable this feature on your iPhone and iPad.
Requirements
- iPhone, iPad, or iPod touch
- iOS 11.4 or above firmware
- Internet connection
Enabling Messages in iCloud on iPhone/iPad
Step 1 Ensure your device is connected to the internet. If it isn’t, connect to a Wifi network or else your message will not sync with iCloud.
Step 2 Open Settings and tap on your Apple ID.
Step 3 Go to iCloud, scroll down and toggle the Messages option on.
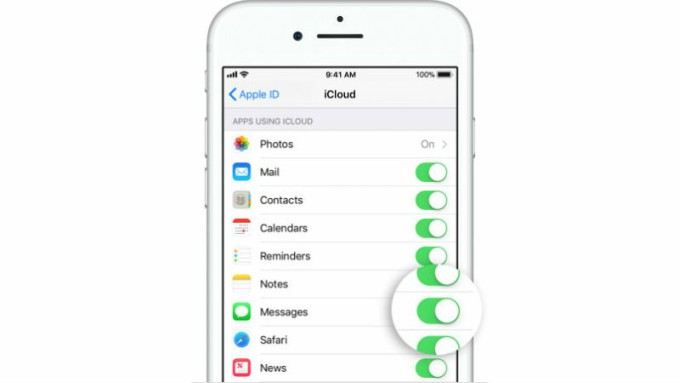
Step 4 Wait until all messages have been synchronized.
All your messages will be synced to the cloud from now on. Just be sure to repeat the aforementioned steps on all Apple devices that you own.


The tiny little “Enable Messages in iCloud” option is how to get Messages on your Mac to match Messages on your iOS devices. By enabling the messages on iCloud can synchronize all messages.