Today I have some good news for you all. Hackers tihmstar and s1guza have finally released Phoenixpwn jailbreak for iOS 9.3.5. Here’s how you can download and use it to jailbreak your device.
- Update (July 23, 2019) – Version 5 released with offsets for iOS 9.3.6 firmware.
- Update (August 9, 2017) – Version 3 is now up. It fixes custom offsets. The download link is updated and a mirror will be up soon.
- Update (August 8, 2017) – Version 2 is now live and fixes bogus binary files that can cause issues.
- Update (August 8, 2017) – You can now install it directly from the internet without using a computer or Cydia Impactor.
Table of Contents
What is Phoenix jailbreak?
Phoenixpwn is a semi-untethered jailbreak tool for iOS 9.3.5 firmware. It is compatible with all 32-bit devices. Here are the names of developers who have worked on it.
- Semi-untethered exploits – s1guza and tihmstar.
- User interface – REALKJCMEMBER.
- Other – mbazaliy and qwertyoruiop.

If you have a legacy device kicking around, be sure to jailbreak it using Phoenixpwn. Moreover, the installation process is fairly simple and its UI looks a lot like Home Depot jailbreak.
Herein, I will be demonstrating the Phoenixpwn jailbreak procedure using my iPad mini running 9.3.5.
Why is Phoenixpwn jailbreak useful?
This tool is of immense importance as iOS 9.3.5 is the end-of-life firmware for pretty much all 32-bit iOS devices. These devices are now jailbroken for life as we already have a jailbreak for iOS 9.1-9.3.4.
Here’s what you can do with iOS 9.3.5 jailbreak –
- Run Cydia tweaks on iOS 9.3.5 (Recommended).
- Downgrade to iOS 8 or lower firmware (with proper SHSH Blobs).
- Dual-boot different firmware versions on the same 32-bit iOS device using Coolbooter.

These are the applications of this new tool. You can perform any of the above actions using this. You can also downgrade to certain versions without SHSH Blobs.
However, I wouldn’t recommend you downgrade to iOS 8 as app compatibility would be a major issue. This is because iOS 8 is now considered as “legacy” and hardly any app supports it.
As far as the stability on iOS 9.3.5 is concerned, it runs very smooth on my iPad mini. Therefore, the first option is always recommended.
Which devices are compatible?
iPhone
- iPhone 4S
- iPhone 5 (GSM)
- iPhone 5 (Global)
- iPhone 5C (GSM)
- iPhone 5C (Global)
iPad
- iPad 2 (WiFi, GSM, CDMA, Mid 2012)
- iPad mini (WiFi)
- iPad 3 (WiFi)
- iPad 3 (GSM)
- iPad 3 (CDMA)
- iPad 4
iPod
- iPod touch 5
Download Phoenixpwn
- Official link
- Mega.nz mirror
Requirements
- A compatible iPhone, iPad or iPod touch running iOS 9.3.5/9.3.6
- Download Cydia Impactor
- A working Internet Connection
- A computer running Windows/Mac/Linux
- A genuine USB cable
How to jailbreak iPhone, iPad, iPod on iOS 9.3.5 with Phoenixpwn
Without Computer (No PC)
Step 1 Open Safari browser.
Step 2 Go to this web address – ayouch.me/phoenix. It already has the iOS 9.3.5 jailbreak file loaded into the webpage itself.
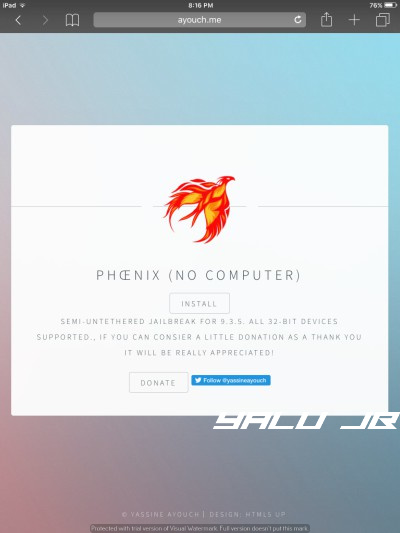
Step 3 When you get to this screen, press the install button.
Step 4 Wait for it to install. Once it’s done, go to General > Device Management and verify its developer profile.
Step 5 Proceed with the tutorial given below beginning from Step 10.
With Computer
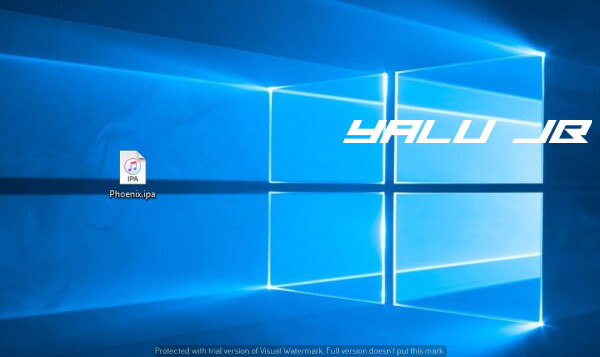
Step 1 Download the Phoenixpwn IPA file from the download links given above. The IPA file has a size of 47.2 MB.
I have also uploaded the file to Mega.nz just in case the original download link goes down. I also recommend you put in on your desktop to make the process easier.
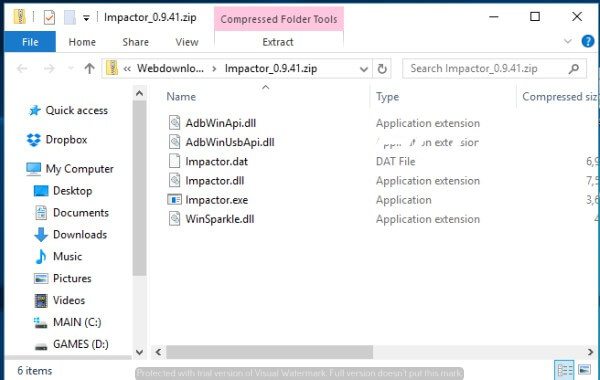
Step 2 Download Cydia Impactor utility from the link given above if you haven’t already. Open the ZIP archive and unpack its contents to any location or folder.
Step 3 You are all set now and everything is in place. Now you just need to connect your iOS device to the computer and start the actual jailbreak process.
Step 4 Wait for Cydia Impactor to recognize your device. It will do so almost instantly but if it doesn’t try changing USB slots.

Step 5 Now drag and drop the Phoenix.ipa file over to the Cydia Impactor window.
Step 6 Impactor will now ask you to enter your Apple ID username and password. You can safely enter your credentials here as they are only sent to Apple’s servers.
However, if you are a bit too paranoid about your privacy, you can also create another “burner” Apple ID and use that.
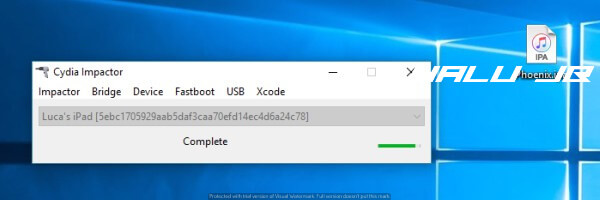
Step 7 Wait for the IPA file to be installed and let Impactor do its thing. Once it says “Complete” as shown below, you can safely disconnect your device from the computer.
Step 8 Phoenix jailbreak app will now be present on your home screen. However, if you open it, it will throw the Untrusted Developer error. To fix this, open the Settings app and navigate to General > Device Management on your device.
Step 9 Select your Apple ID email, tap Verify app and press Verify again to confirm. Wait for it to be verified.
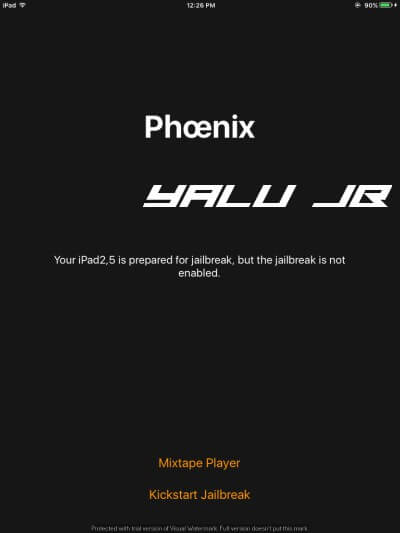
Step 10 Run the Phoenixpwn app and tap on Prepare For Jailbreak.
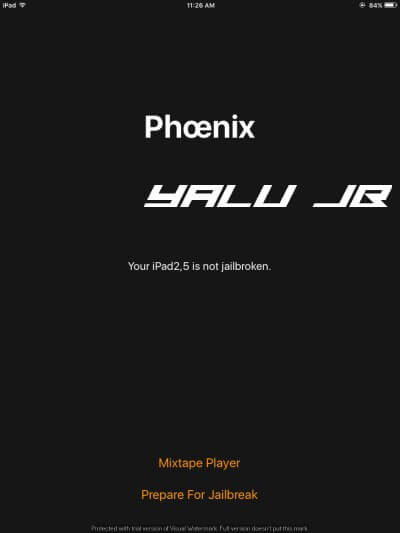
Step 11 It will now prompt you to download the Mixtape Player. You can download it using the Download Free Mixtape Now button or you can tap the Proceed with Jailbreak button to continue installing Cydia.

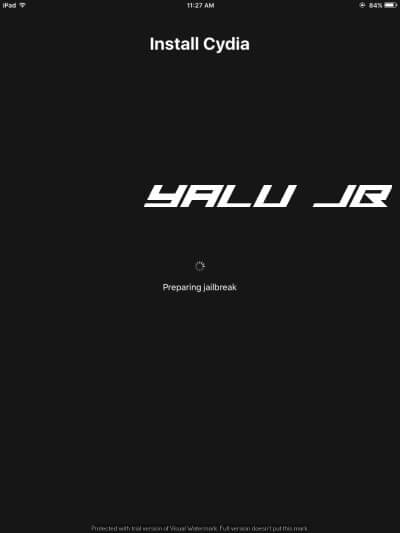
Step 12 Phoenixpwn will now begin patching the kernel, filesystem and installing the exploit. It will also enable the tfp0 patch on your device. Just be patient and wait for it to complete.
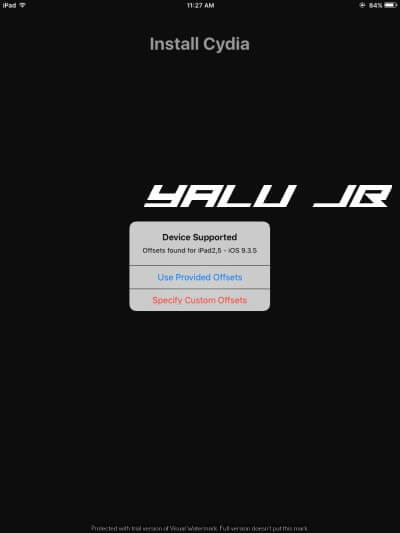
Step 13 It will now perform a check to ensure your device is supported. Once you get to this screen, tap Use Provided Offsets.
There’s no need to use the Specify Custom Offsets feature as all the offsets are built into the app.
Step 14 Wait for your device to respring. Once it’s done, Cydia will not be present on your home screen.
Step 15 Go ahead and start installing your favorite Cydia tweaks! That’s all there’s to it. Hope you enjoyed this tutorial.
If you do happen to run into some issues, just leave a comment below.
How to Rejailbreak your device with Phoenixpwn
After Rebooting
As you already know, Phoenixpwn jailbreak is semi-untethered. This means as soon as you reboot your device, you will need to jailbreak it again.
To do this, simply launch the Phoenix jailbreak application and select the Kickstart Jailbreak option. That’s it.
This will again put your device in jailbreak mode.
After 7 days
After every seven days, the app will expire. As soon as you open it, it will start throwing the “Untrusted Developer” error.
You must then reinstall and sideload it with Cydia Impactor using the in-depth tutorial given above.
The 7-day limit exists only on free accounts, not paid accounts. If you are using a developer account, the app will remain signed for a period of one year.
I know this process looks cumbersome at the very outset. But once you get the hang of it, it seems very easy. For those who don’t have access to a computer all the time, wait for an ext3nder-like solution for your firmware.
Here’s an update – once the app runs out of signing, simply use ayouch.me/phoenix to install it again.
How to safely Upgrade to new versions
Developer tihmstar has already stated that using the v2 directly after v1 will not fix the gsc error. Although we now have a second version, it requires some manual work before we can get it working properly with all the fixes.
Version 1 to Version 2
Here’s how you can safely upgrade from version one to version two.
Step 1 Download Mterminal from BigBoss Cydia repo.
Step 2 Enter the following commands step by step and press return key after each line. type
su
alpine (this is your default password)
rm /usr/bin/sed && /usr/libexec/cydia/firmware.sh
Step 3 Once this is done, execute the “restart” command –
reboot
Step 4 Once your device restarts, kickstart the jailbreak using the rejailbreak procedure given above using v2. That’s it.
You can also clean restore your device and jailbreak from scratch with Phoenixpwn 2.0. No matter which method you choose, just don’t forget to update.
Version 2 to Version 3
Version 3 is actually a minor update but it’s still good to stay on the latest version. The updating process is really simple.
Just sideload v3 IPA file using the tutorial given above. Doing this will automatically replace v2. You don’t even need to trust its developer certificate again.
Did you Jailbreak iOS 9.3.5?
This will surely bring back your legacy device back to life. I don’t know about you but I still use my iPad mini and it feels good to know it won’t be gathering dust anymore.
I am off to install my favorite Cydia tweaks! But what do you intend to do with your older device? Let us know in the comments section below.
For more such tutorials and guides, follow us on Facebook and Twitter.


It says file not found whenever I try to go the ayouch website
I am trying to open it but it doesn’t open
The app must be unsigned if that’s the case. Try resigning it with Impactor again and then open it again.
Though Phoenix app isn’t available on its site without computer but u can download Tutu helper Chinese app and u can install Phoenix app without pc….I did that and now enjoying the cydia tweaks in my iPad mini 1,,.i recommend u all to download Phoenix from tutu helper app
Thanks for the tip, Sahil.
Baixar esse aplicativo
Baixa